
Build a Dining Table With The Adjustable Mortise Jig and Tenon Fastener System™
Build a high end table for a fraction of the cost! It is easier than you think. Most people believe they need to have years of woodworking to build a table. The truth is you just need to be familiar with a few tools and have a basic understanding of carpentry and shop tools.
The approximate cost for building the table as designed is ~$1600 (this will of course vary for everyone)
- Wood only - $1,100
- Adjustable Mortise & Tenon Fastener Jig Starter Kit with 1/4" 6"x6" Adaptable Tenons - $359
- Screws - $20
- Everything Else - $100 (Sandpaper, Glue, OSMO finish etc.)
Lets get into the details about what you will need to build this table.
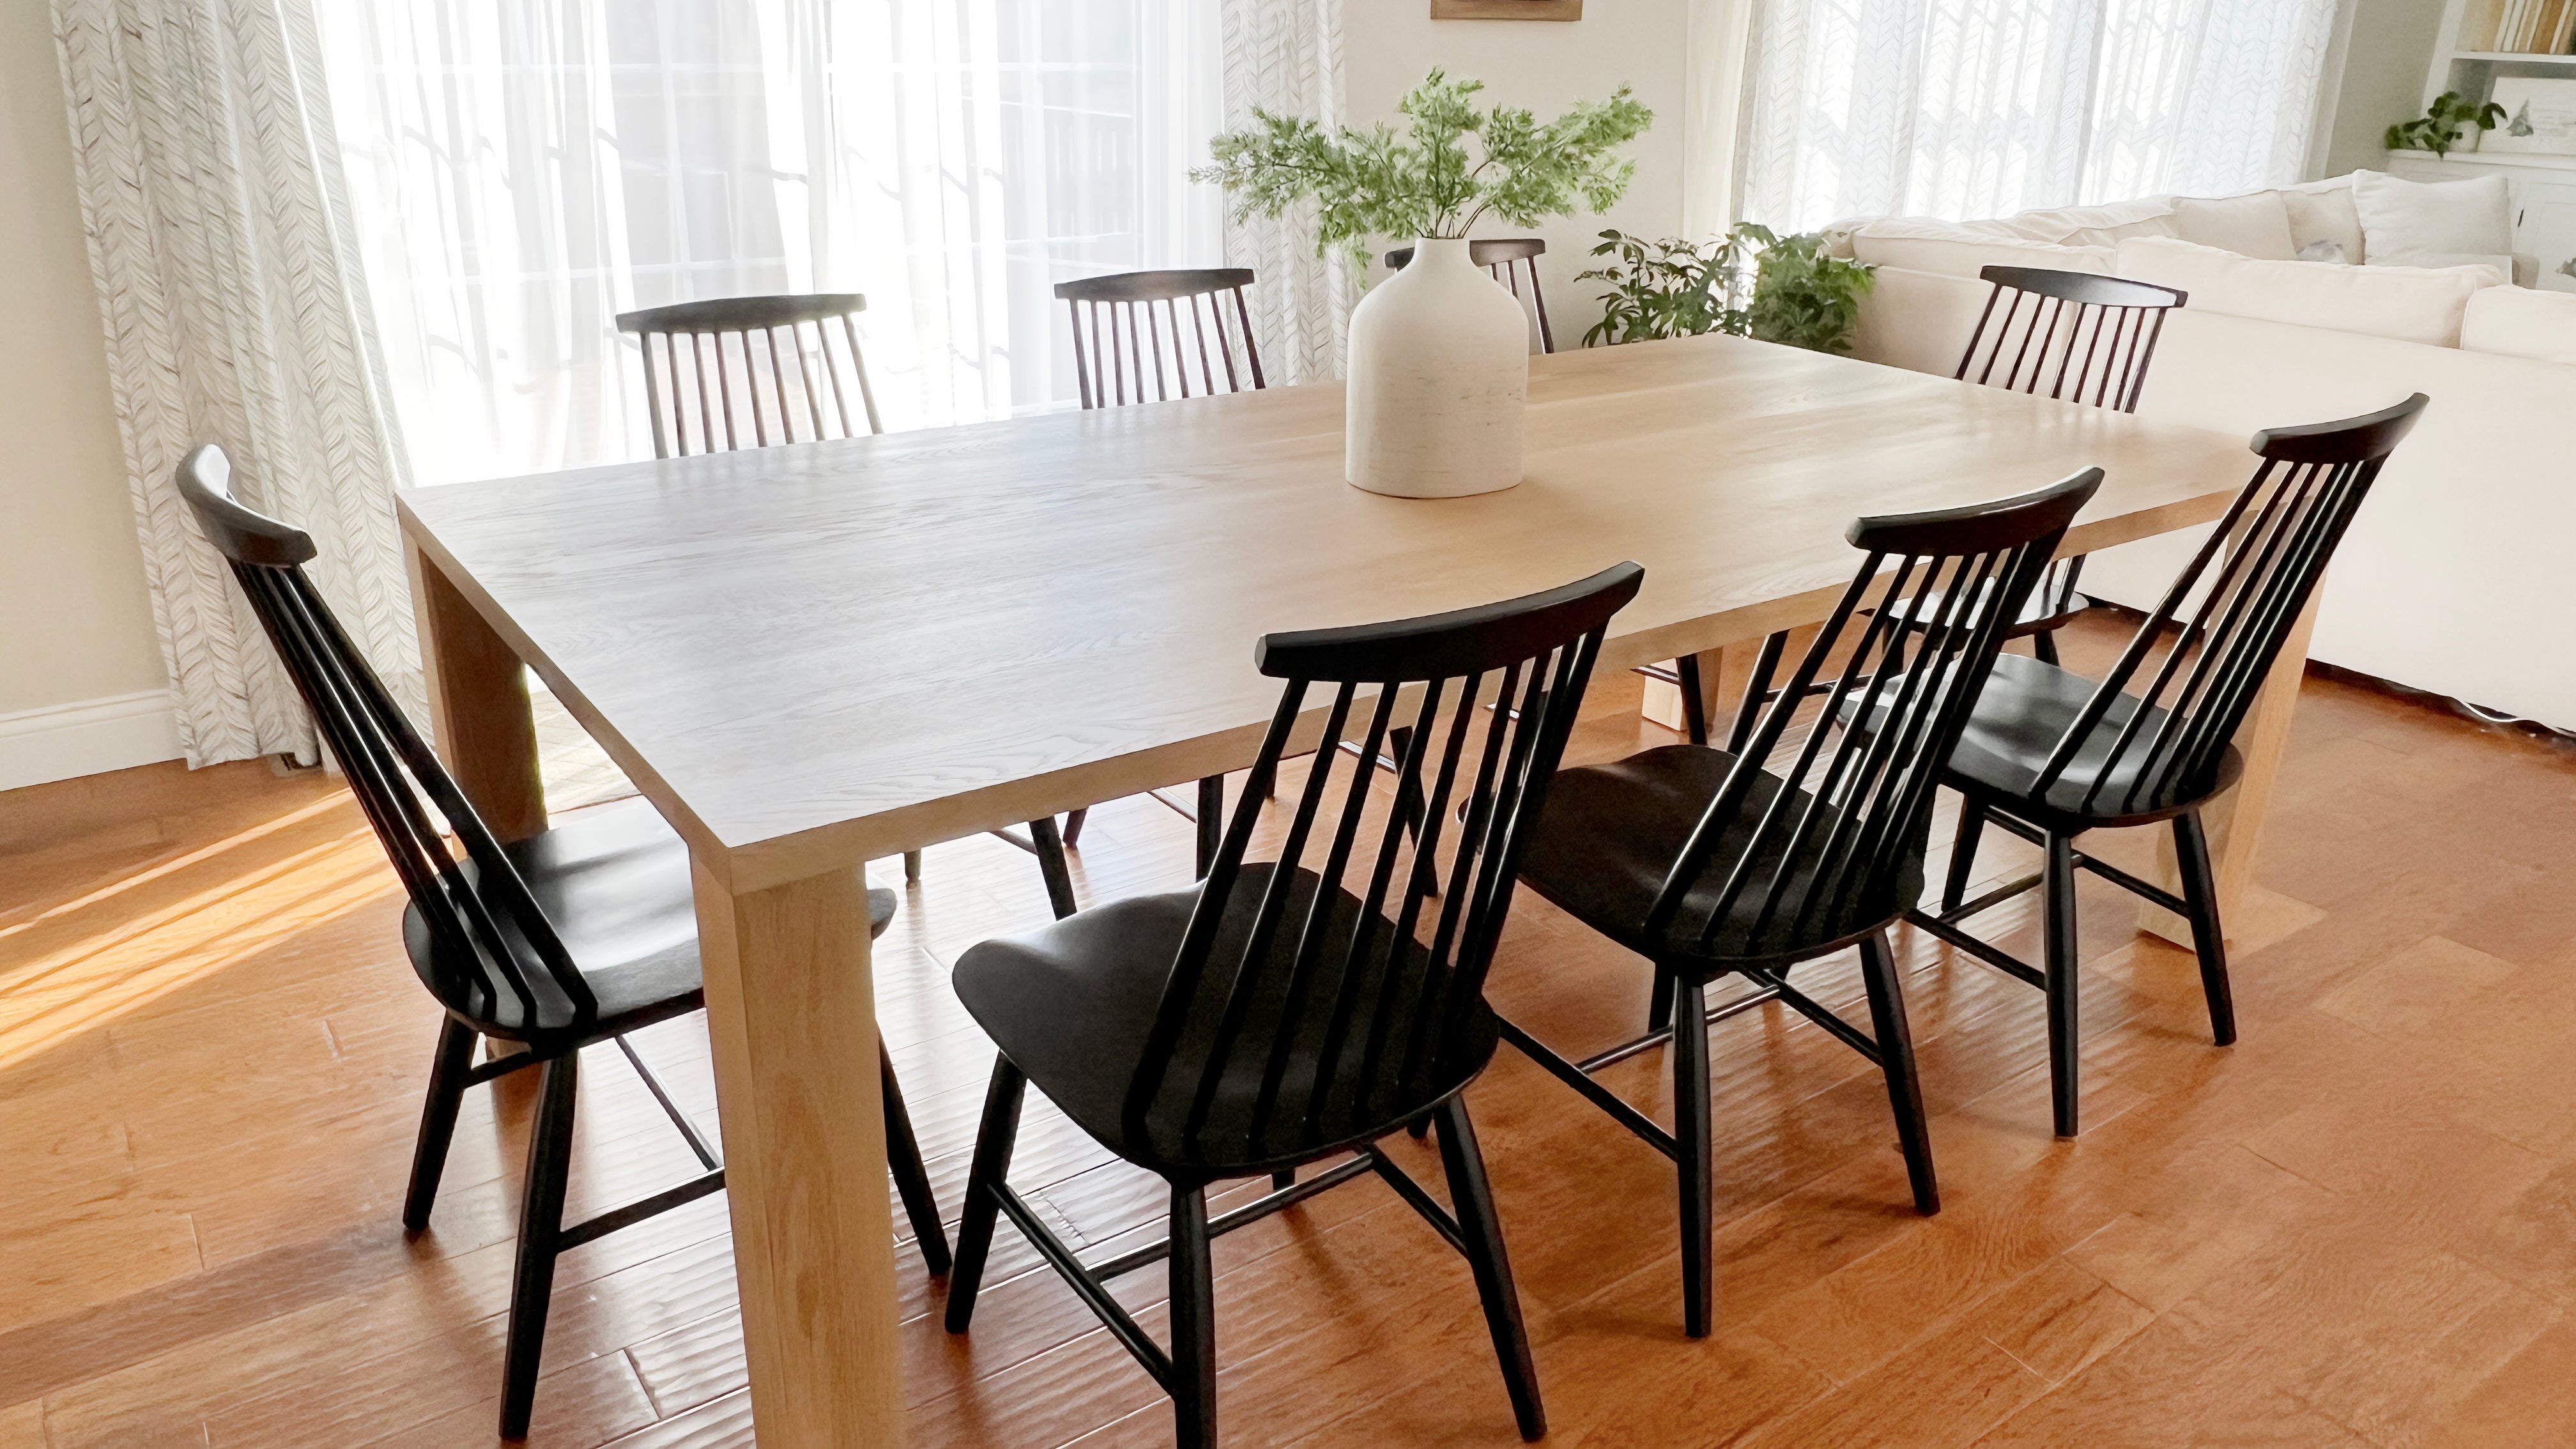
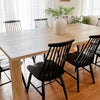
The Dining Table measures 92" long by 48" wide by 30" tall. The height was chosen so that it would work with most standard chairs.
There is a full build series on my YouTube channel (How You Can Make It) if you would like to follow along or watch the video bellow.
How To Build a Modern Large Table
Tools You Need For This Project
Power Tools
- Miter Saw | https://amzn.to/2XgnJCo
- Table Saw | https://amzn.to/2XfJliB
- Planer | https://amzn.to/3vKXzqi
- Jointer (Optional) | https://amzn.to/3IqWtYj
- Band Saw (Optional) | https://amzn.to/3ZjfnX0
Hand Tools
- Makita Track Saw Kit XPS01PTJ | https://amzn.to/3Zbrkhw
- Plunge Router | https://amzn.to/36OROLM
- Orbital Sander | https://amzn.to/3skFGfh
- Cordless Drill | https://amzn.to/3QiPqTF
Other Tools
- GRS-16 PE Parallel Edge Guide Rail Square | http://bit.ly/3KFK5Es
- TPG Parallel Guide System | http://bit.ly/40Ntvbo
- 24 in. Quick Grip Clamps (4 clamps) | https://amzn.to/2LrPlO2
- Pipe clamps 1x | https://amzn.to/3BnbbJQ
- Tape Measure | https://amzn.to/2wGQGLU
Safety Tools
- Bow Push Stick | https://amzn.to/3TUQKzl
- Bow Feather Pro | https://amzn.to/4ctaEsJ
- Micro Jig GRR Ripper | https://amzn.to/2Xy05ze
Instructions
To make this project you can follow these basic steps or download our detailed plans. Tag us on social if you're building this project (@philipmillerfurniture on Instagram) with the hashtag #millerhardware.
Step 1
Select the species of wood you want your table to be made out of. We selected White Oak. When selecting your lumber be sure you select the proper thickness. Milled lumber is available in several thicknesses and is measured in quarters 1/4, 2/4, 3/4, 4/4, 5/4 etc. The table that we are making is 8/4 meaning it is 2in thick.
Step 2
Lay out your boards out to determine what pattern, color or woodgrain you want to have as the top. Mark your top with a marker so you don't forget what is your top and what is your bottom. It is also a good idea to number the order of your boards as they are laid out.

Step 3
Square up your boards. To do this you will need to either join the two sides of your board and then plane the surface. Once your board is square you can take it over to your table saw and place the square side against the fence and trim your board the the proper width. Then you will want to take your board and run it thought a plainer to make all the boards the same thickness.
Step 4
Next, you want to join all your board together. You can either just simply glue and clamp the edges or you can create dominos and join your boards together. Build your top in sections. We recommend doing this in 4 sections and once you have each section made you can move to the next step.

Step 5
You should have 4 sections that are glued together than make up your table top. Take each section and run it through a plainer to clean up any glue or unevenness that occurred while clamping.
Step 6
Now you will want to take 2 of the 4 boards and join them together using glue or dominos. When you are done you should have 2 joined boards that will make your table top.
Step 7
Next take your two boards and run them through a planer. You will need access to a 24" planer if you do not have access to one you will have to clean the two boards up by hand using a hand planer and sander.
Step 8
Take the two haves and join and glue them together to form your fully joined table top. Once the glue is dry sand it off and move on to the next step.

Step 9
To prep your top for the finish you will need to sand your top starting with 80 grit sand paper working your way up to 220 grit.

Step 10
Once the top and bottom of your top is sanded it is now time to move onto attaching your table legs.
Step 11
Place the Bottom Indexing Member on the corner and edge of your table and then set the Top Mounting Member in the #6 slot/groove.

Step 12
Fasten the Top Mounting Member with a pair of #6 screws.
Step 13
Set your plunge depth to router a 1/4" mortise. This should corresponds to the 1/4" Adaptable tenon.
Step 14
Plant your plunge router atop the jig and power up the router and plunge slowly downward and move the pattern bit along the jig’s edges with a slow and steady rhythm.

Step 15
Once your mortise is cut and cleared, power down your router and unscrew the Top Mounting Member and remove the jig. You may need to tidy up the mortise sandpaper.

Step 16
Attache the self-centering bit to your drill and position the Indexing Member on the corner of the table leg. Clamp down the Indexing Member.

Step 17
Pilot your self-centering bit to pre-drill the two counterbore holes. and screw in two pan head screws so they are just snug enough to allow wiggle room but not enough for a full-on jiggle.

Step 18
Place the attached Adaptable Tenon Fastener into the mortise and adjust and finagle until everything’s flush with your workpiece’s edges. Remove it, and tighten the screws.
Step 19
After ensuring everything is snug, pre-drill the remainder holes with the self-centering bit.
Step 20
Join the tenon to the leg with the #12 screws and then remove the two pan head screws and screw in the two remaining screws with #12 screws.
Step 21
Next, place the tenon into the mortise and pre drill the holes using the self-centering bit. Once your holes are pre-drilled install your screws.

Step 22
Have someone assist you in flipping your table over. It is important not to use the leg as a pivot point as the weight of the table will snap any joint. You must flip and turn the table over in mid air. We recommend 4 people helping with this step.

Step 23
Celebrate and tell your friends your a master furniture maker. Take a photo or video and share it with us. Tag us on social if you're building this project (@philipmillerfurniture on Instagram) with the hashtag #millerhardware.
-
Posted in
fastener, Table, woodworking, woodworking project
